Picture an image so inviting that it instantly transports you to another place, drawn in by expansive horizons, mesmerizing color, and detail so fine that you can almost touch the grass and feel the wind.
We have all seen these photos, and many of us aspire to create them. What visually unites these exceptional landscape images is that they all have lush color, rich detail, and properly calibrated hue, exposure and saturation. But they likely did not start out this way. When shooting landscape images, it often happens that the sky turns out too bright, while elements on the ground - houses, trees, and people - are underexposed and almost invisible. Using Picktorial, you can quickly and easily edit landscape photos so as to highlight their true beauty and rich detail.
A Quick Word About RAW
When shooting and editing landscape photos with significant variation in brightness among different regions in the image, it’s often helpful to work with RAW format images. As its name would suggest, RAW is an image file whose large size and “unfinished” format gives the photographer greater control over post-production elements like color and exposure. RAW images - which don't typically utilize lossy compression - usually represent light with 14 bits per pixel channel, and produce about 16,000 levels of color intensity. In contrast, JPEG images are comprised of just 8 bits per pixel channel, which yields only 256 levels of color intensity.
RAW images capture a higher dynamic range, which permits greater flexibility in adjusting image exposure during post-production; in particular, in raising brightness. A RAW file and a high-quality JPEG may initially appear similar, but will eventually diverge during post-production brightness edits. In fact, a JPEG’s compression may ultimately make the file appear posterized after significant brightness adjustments.
All of that said, although RAW files are very useful, they are not completely necessary to create incredible images. If you don’t plan to shoot landscape images with significant variance in brightness between one image segment and another, or just prefer to shoot in JPEG, Picktorial remains a powerful tool with which to create masterpieces, whether you plan to frame them, upload them to Flickr, or just use them as a gorgeous desktop background.
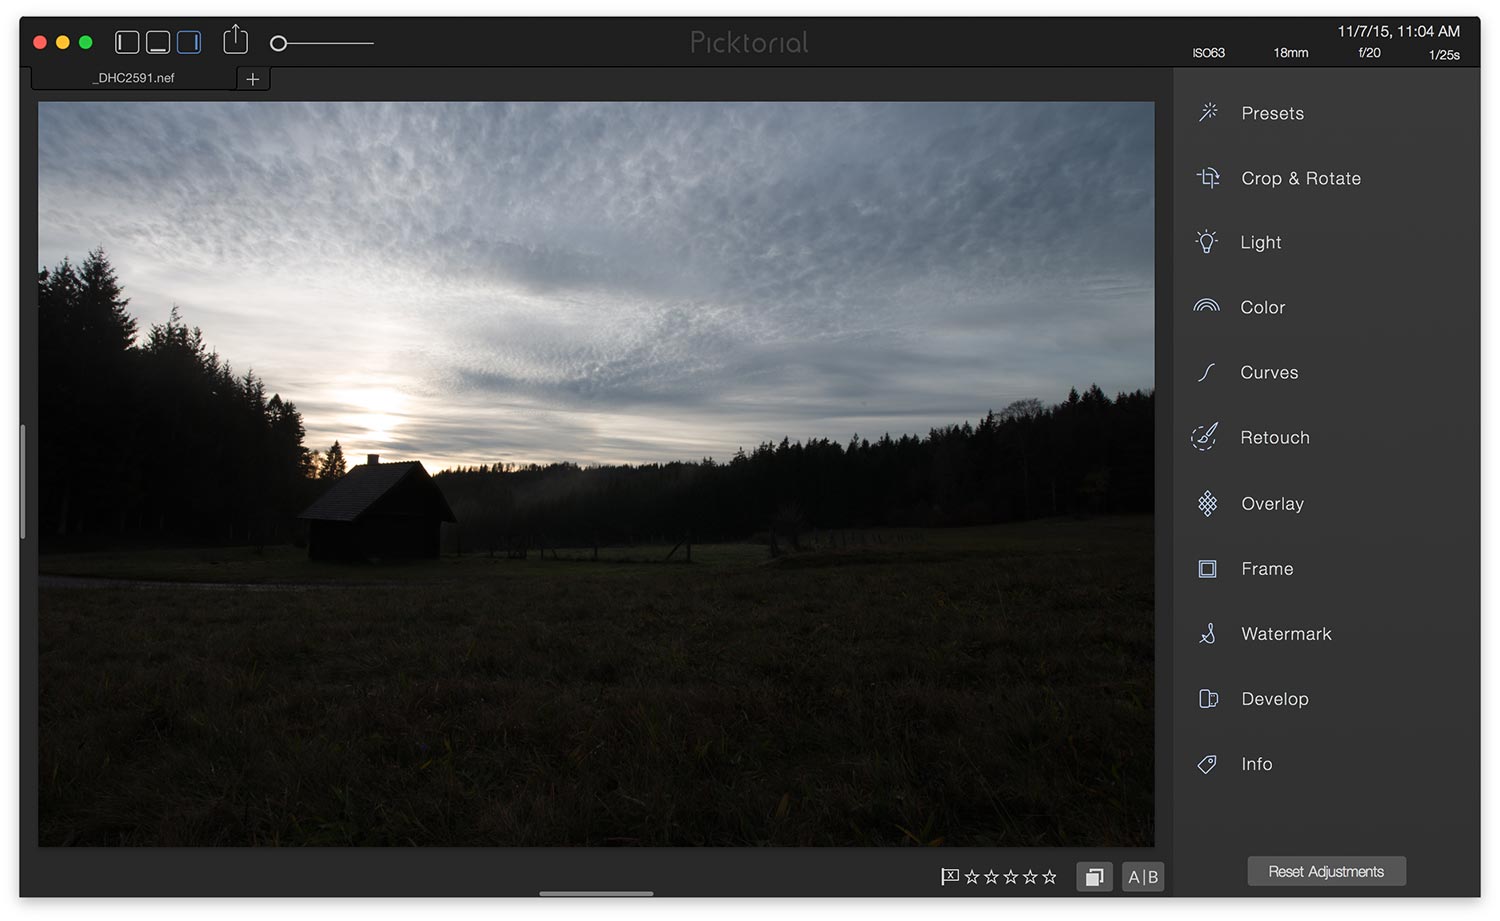
In our case, we’ll be using a stunning RAW shot of the Black Forest in Germany, taken by the talented photographer David Cohen. For a beautiful but challenging shot like this one, Cohen opted to use a Nikon D810, which provides a solid noise-to-signal ratio in low-light conditions. As you can see, he deliberately shot the image “dark” to avoid “blowing out” the sky, knowing that it would be easier to recover dark regions than to fix over-exposed highlights.
Step 1: Using Retouch to see the forest for the trees

For our first step, we’ll want to use the Retouch > Tone tool to adjust the exposure of several parts of our image. We’ll start with the grass and trees in the background. Based on the look we’re trying to achieve, I’ve increased the color temperature to 13, ramped up the exposure to 4, and upped the contrast to 44. Remember that you can adjust brush size at the bottom of the viewer or by scrolling the mouse wheel, and so your brush can be as broad or targeted as you need it to be. I suggest using a larger brush to roughly define the region - say, the trees - and then trim down using a more targeted brush by using the eraser (next to the highlighted blue paint brush, in the lower left of the screen).
Step 2: Using Retouch to brighten the house
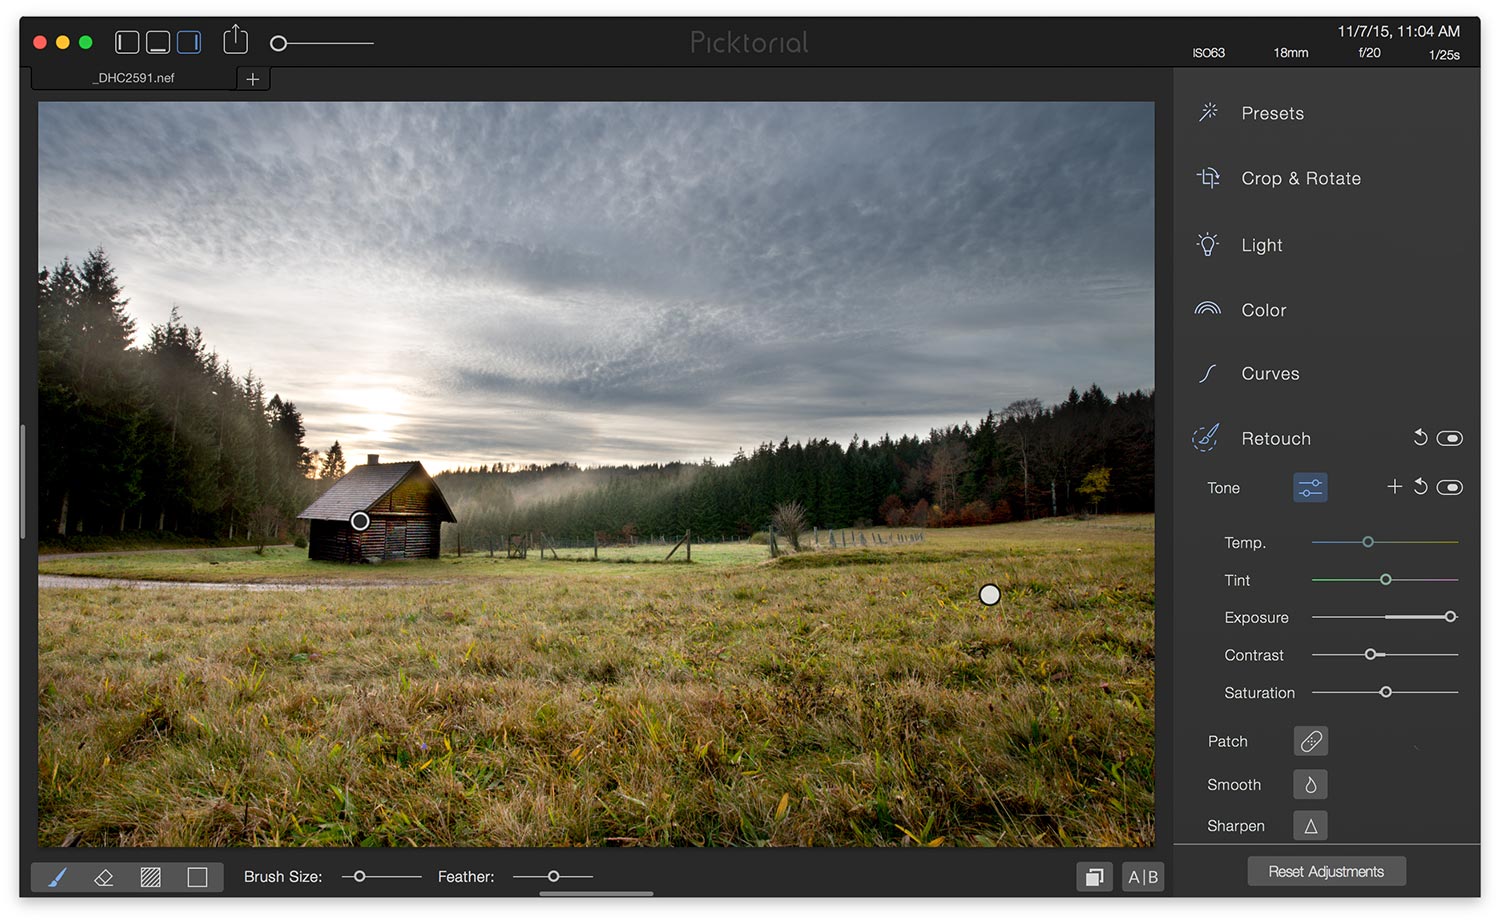
We’re going to employ the same type of effect on the house closer to the foreground, but tweaking the contrast and exposure slightly. In this case, we’re going to leave the temperature and tint where they are, and raise the exposure to about 3.25, while reducing contrast to -22.
Step 3: Darken the sky
At this point, we’ve effectively compensated for the camera’s limitations and balanced the image’s brightness across different regions, while also maintaining its naturalistic, pastoral look. We’re now going to use a few different tools to make the image look a bit more exciting, if slightly less faithful to the original. But, as you’ll see, the results will be truly dazzling.
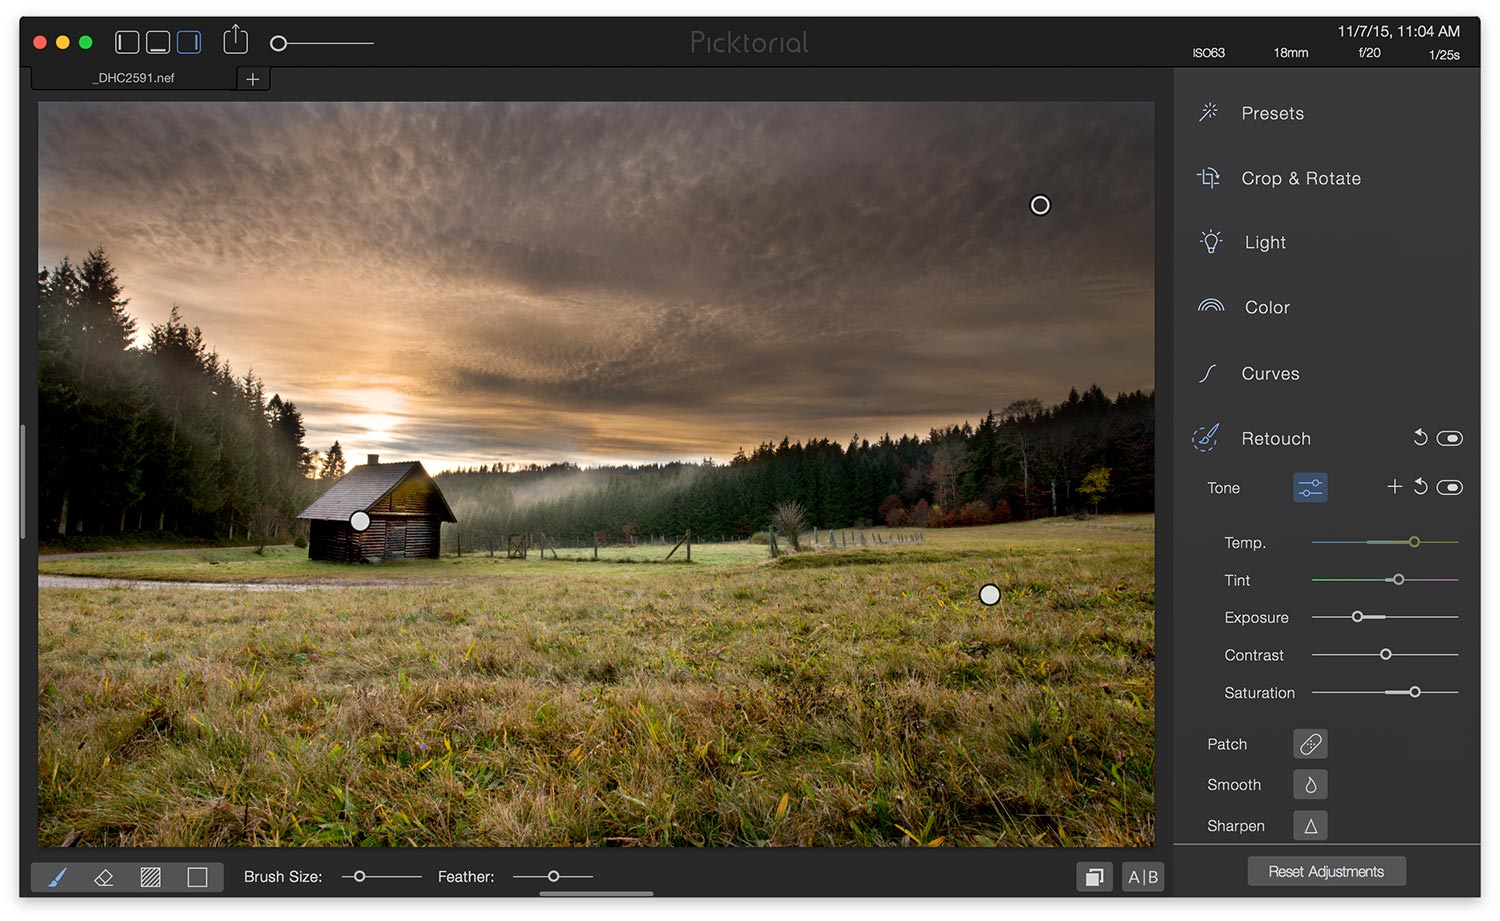
We now want to darken our sky slightly, and so I’ll use the brush to select broad swathes of sky, and reduce the image’s exposure to -1.20. We’ll then turn our attention to Temperature and Tint. The Temperature slider runs along a cold-to-warm (blue-to-yellow) axis. The more to the left the slider is, the more your sky will take on a blue hue, the more to the right, the more yellow it will be. For our image, we’ll want to highlight the yellow undertones present in the sky, so I’m going to increase the Temperature to 52. We’ll then use the Tint slider (which runs along a green-to-magenta axis) to increase the tint to 18, to a slightly more magenta-hued pink. I’ll then increase the sky’s Saturation to 41, since reducing it would make the sky seem overcast, and increasing it would create an unrealistic yellow hue. Depending on your image, you may want to revisit Retouch after the Color changes we’ll make in step #6, since adjustments we’ve made to the image’s exposure and saturation above will be refracted considerably by subsequent color edits.
Step 4: Using the Patch tool to mend fences
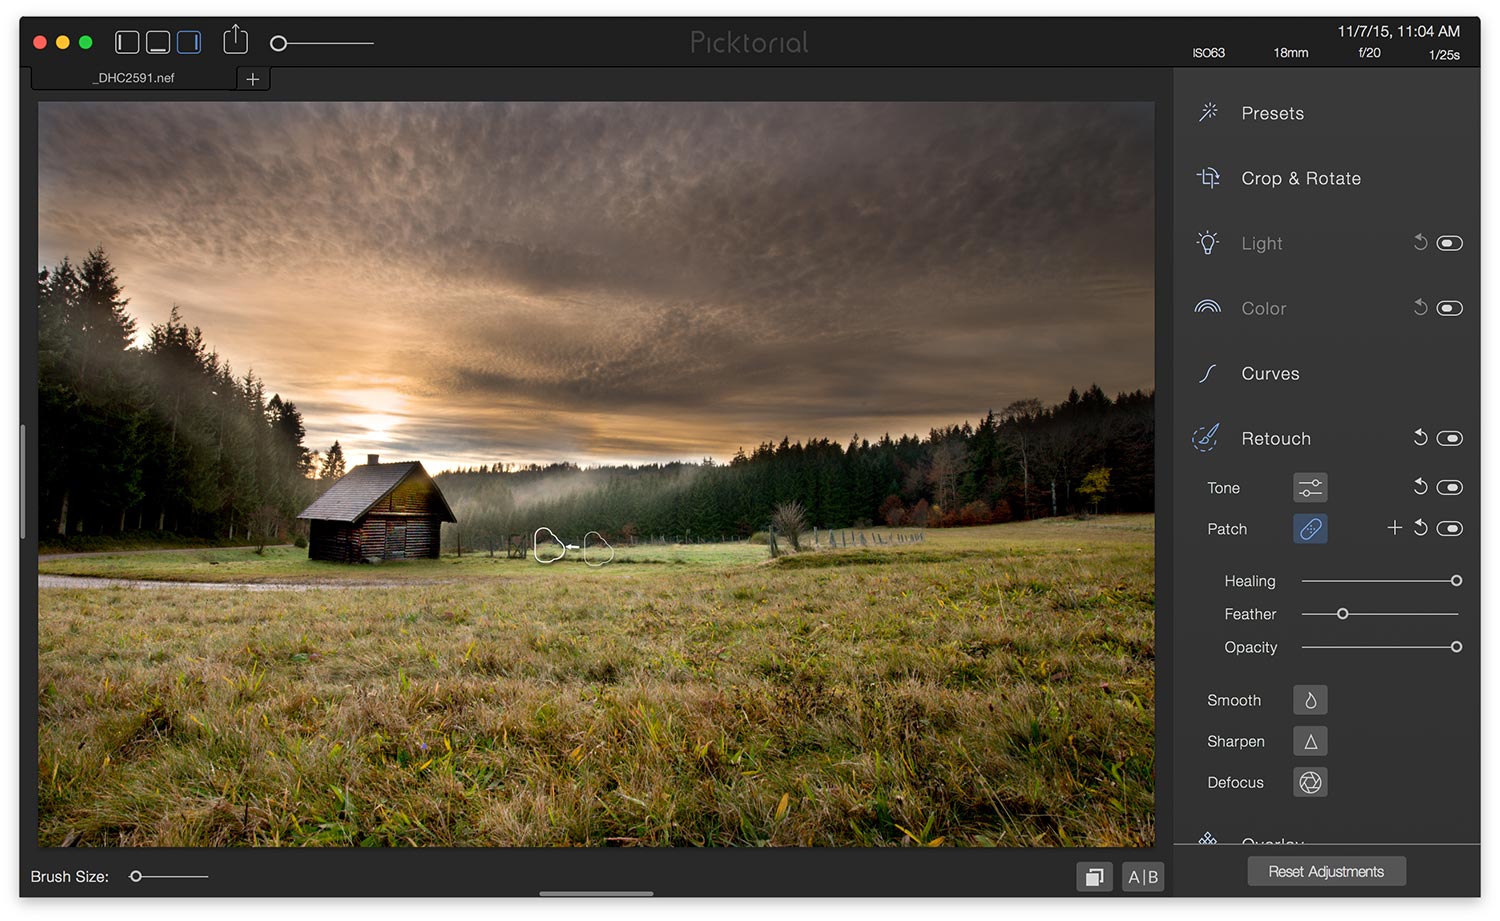
You may notice the slightly broken fence in the middle of our image, along the right side of the house. It detracts slightly from the tranquil pastoral look I’m going for, and it also draws the viewer’s attention away from the solitary house. We’re going to use the Patch tool, nested beneath Retouch, to carefully remove the broken fence. Remember that the patch tool will allow you to designate a target area, and then transplant a visually similar segment onto the original portion.
Step 5: Adjusting light and boosting colors
We’re now going to zoom out, and adjust the image’s lighting as a whole, by making use of the aptly-named Light toolset. We’re now familiar with Temperature (blue to yellow axis) and Tint (green to magenta axis), and so I’ll use those sliders again here, albeit this time on a picture-wide level. I’m going to reduce my Temperature slightly to about 5100, while ratcheting up the Tint to about 6. I’m also going to reduce my exposure to about -0.55, again for the purpose of darkening the image as a whole.
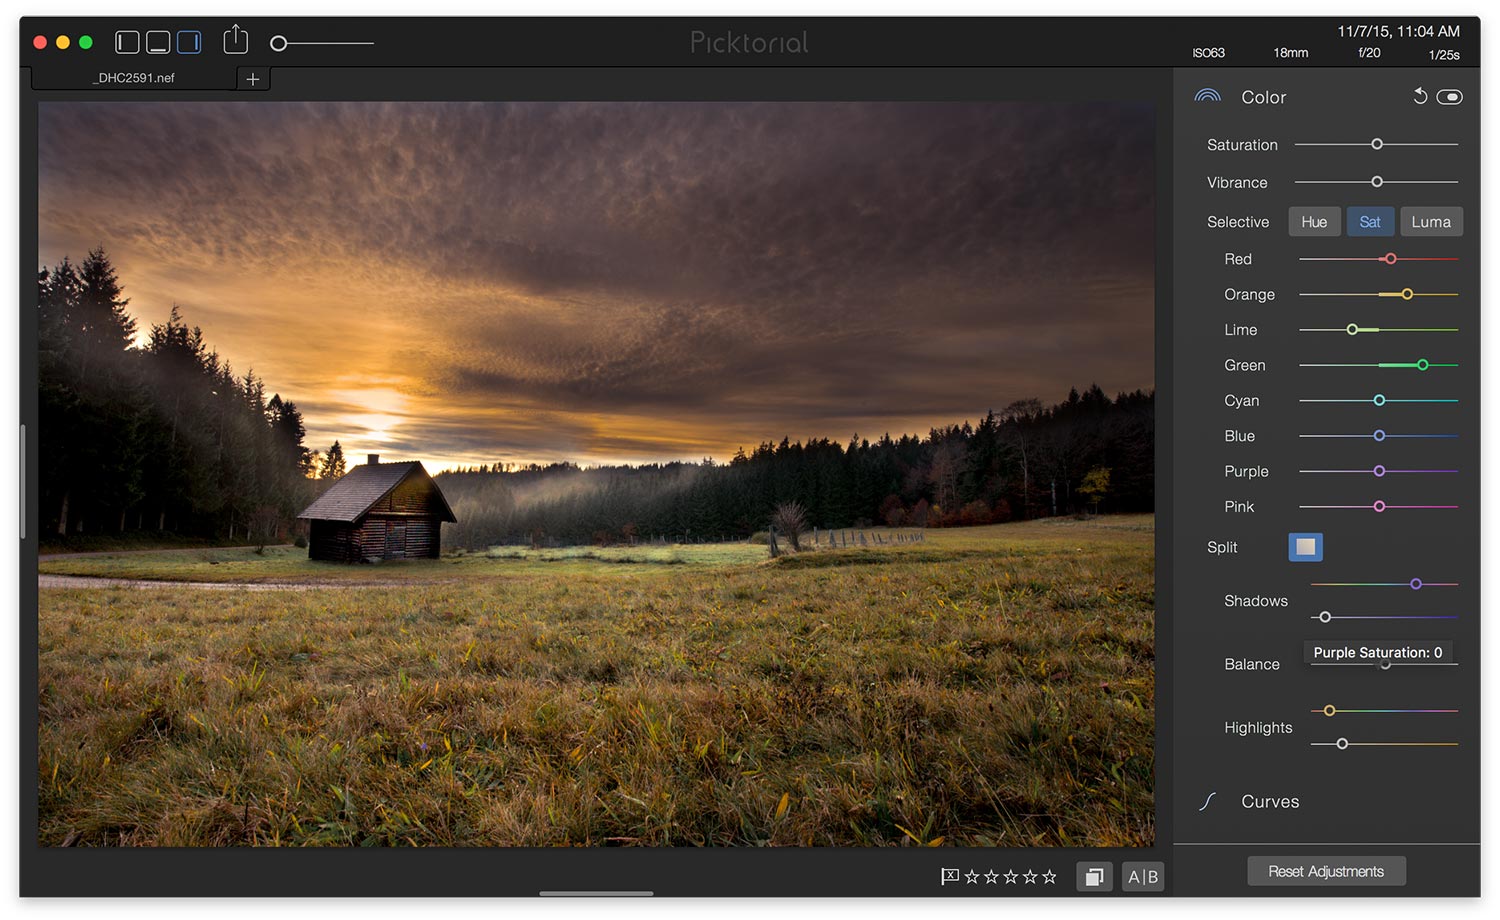
Our image looks great, but we still want to emphasize the vibrancy of the sky and grass. To do so, we’re going to use the Color toolset. Underneath the Color toolset, there are three primary subcategories: Hue, Sat (Saturation), and Luma (Luminance). Clicking any of those buttons will reveal a submenu of color sliders, ranging from Red to Pink. Moving the sliders in one direction or another will allow you to adjust only the selected hue, saturation or luminance of a given color, or colors, within your image. For my photo above, I’m going to leave the Hue at its default level, and concentrate primarily on Sat. To bring out the reds and oranges of the sun setting just beyond the cabin, I’m simply going to raise the amount of red and orange that appear in the picture, in this case to about 15 and 36, respectively. To intensify the color of the grass, I’ve reduced the amount of Lime by about -35, and increased the proper green to about 56. I’m then going to switch over to Luma, and increase the luminance of the lime in the image by about 43.
I’m also going to make use of Picktorial’s Split Toning capabilities. Split toning allows you to adjust the hue of your image’s shadows and highlights - on a spectrum of color from red to pink - and to adjust the saturation of a chosen color. Split toning originated in the 19th century, when photographers began replacing the typical silver emulsion used in the darkroom with other chemical compounds, like Selenium. 21st century photo editors can use Picktorial to do their own Split Toning, thankfully without the use of any chemicals.
For our image’s shadows, I’ve raised the hue to 258º, and adjusted their saturation to 8%. For its highlights, I’ve brought the hue to 40º, and put saturation at about 20%. Your results will obviously depend on the type of photo you have, and its pre-existing light, contrast, saturation, as well as your desired end result.
You can use the above tutorial to fix up photos and give images a slightly ethereal appearance, while also maintaining their naturalism. It’s worth experimenting with Picktorial’s powerful tools, and to see how you can best give your image that extra “oomph,” And go ahead, show it off on Flickr and 500px - don’t forget #Picktorial!