We are excited to release Picktorial 3 - a major milestone for Picktorial and a free update for all who purchased the first and second versions. Now is the time to thank you, our users, who have provided tremendously helpful feedback and comments, and helped make Picktorial the best non-destructive photo editor in the market.
Picktorial 3 opens up a whole new level of creativity options and brings pro-level tools while preserving the fully non-destructive workflow, fast performance, and clean user interface of Picktorial. Here are the major new features available in Picktorial 3, divided into three sections:
- Customizable local adjustments with advanced tools that may apply any global feature on a local section, and additional luminosity masks and color masks.
- New live histogram.
- New tabbed panels in the image inspector.
A. Local adjustments on steroids
1. Advanced tools for local adjustments
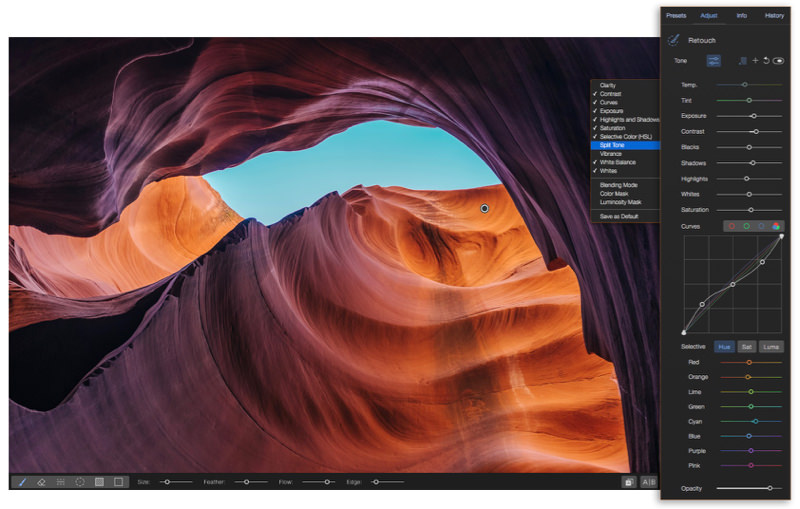
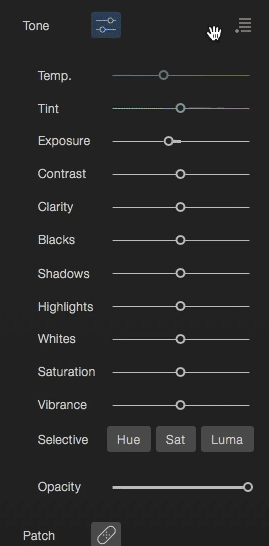
 Local adjustments lets you adjust specific parts of your image in different ways. It may be the subject that needs to pop out, or it may be the sky that needs some brightness attenuation after raising overall image exposure and so on. Often times, the basic Tone sliders would be enough for these tasks. But in some cases you may need more precise control and sophisticated tools to give your photos a top-notch look.
The new version of Picktorial features a vast array of carefully crafted tools and makes them available for you exactly when you need them.
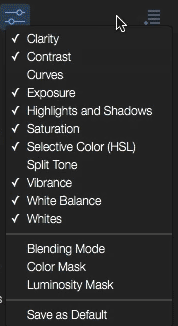
The new palette of tools that appears in the Retouch > Tone tool is fully customizable. You can add tools like Curves, HSL, Split-Toning or any other global tool in Picktorial. You can add them ad-hoc or save them as a default palette for new local adjustments you make in the future.
2. Luminosity masks
 Luminosity masks lets you narrow local adjustments to a specific range of brightness and darkness values on which the effect is being applied.
Luminosity masks have been popularized in recent years among Photoshop users. They are especially effective in emphasizing natural light when editing landscape and portrait photographs. However, the process of preparing and using luminosity masks in Photoshop is a daunting task, or requires external plugins. The blend-if function of Photoshop provides similar functionality but does not let you display and mask. Picktorial 3 provides the best of both worlds: it offers luminosity masks that are easy to use as dragging knobs to define a range, and it lets you display the mask with real-time preview as you create it.
3. Color masks
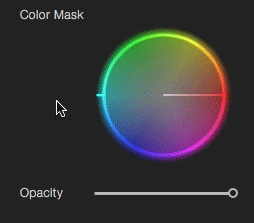
Color masks are similar to luminosity masks, but operates in the the hue-saturation space. It offers a beautiful control that lets you narrow an existing mask by defining a slice in hue-saturation space.
This comes handy when you want to quickly select a region with a discriminative color, like skin, sky, eyes and more, or to gradually emphasize or manipular specific colors of your photo.
In a sense, it is similar to the familiar HSL 8-channel control, but it provides a greater amount of control over the affected colors while working in conjunction with other tools that define the effect itself.
4. Blend modes for local adjustments.

Blend modes enables you to change the way local adjustments are composed on top of each other. For every local adjustment you make, Picktorial creates a layer behind the scene. This layer is composed together with the results of previous local adjustments before applying further adjustments.
The new blend modes open up new creative opportunities and enable you get more precise results with local adjustment tools.
For example, the “Luminosity” blend mode takes only the brightness values from the selected local adjustment, while taking color values from the layer underneath. This is extremely helpful when you want to use sliders like Highlights and Shadow without affecting the hue and saturation.
Some blend modes creates their own effects even if all sliders are at their defaults. For example, the Multiply blend mode darkens the image by multiplying the output of the local adjustment of the layer underneath. So the “Multiply” is roughly analogous to printing the image twice on the same canvas.
Each mode has a unique effect that may be useful in different scenarios. The best way to learn about blend modes is to experiment with them, but there is plenty of information and examples over the internet on blend modes which can provide tips and explain how each of the blend mode operates.
5. Show mask for a local adjustment
This was another feature request we are happy to deliver with the release of Picktorial 3.
We believe that photo editing should be done based on how the image itself looks. That’s why we work so hard to deliver real-time preview for all editing tools in Picktorial. However, sometimes it may be helpful to peek behind the scenes, and make sure that you didn’t leave holes in your mask, or you didn’t overdraw outside the area you want to enhance. This is where displaying the mask comes handy. Simply hit the O key to show and hide the mask.
B. Histogram
6. Live histogram
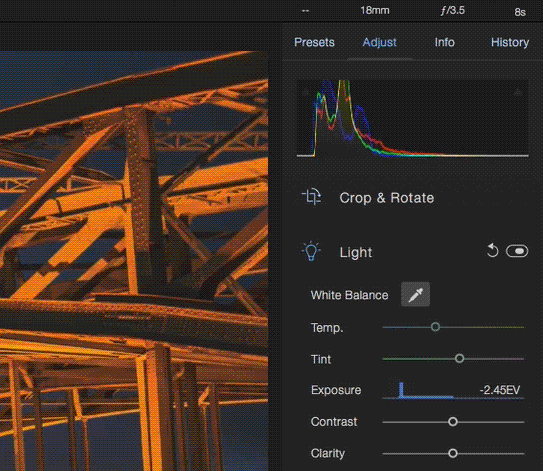
Histogram is an essential tool in Photo editing. It provides an objective view over the brightness of of your image. The new live histogram in Picktorial is probably the most responsive histogram in an editing app of its kind, and it is always live - even when using local adjustments, gradients and brushes.
7. Clipping Indicators
At the top of the histogram you can find new Clipping Indicators. Each turned on if some values of the image exceeds the highest or the lowest values in Picktorial working color space (which is ProPhoto RGB). You can hide and show these clipping indicators by clicking on the image histogram and select “Show Clipping Indicators”.
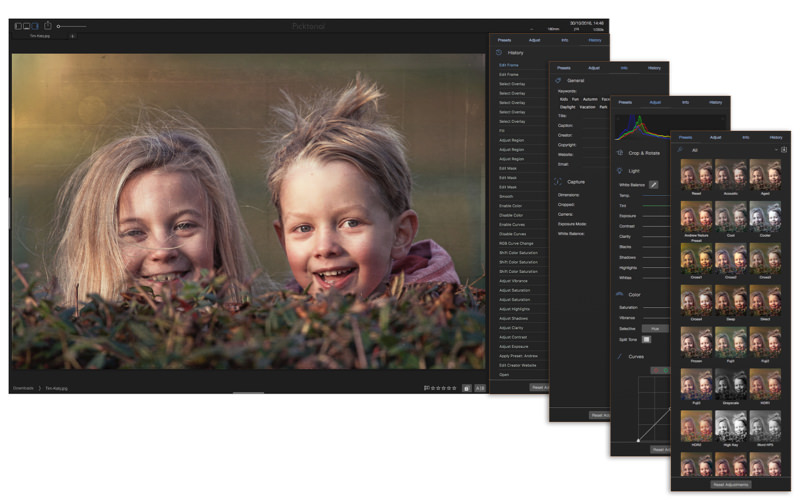
C. New Inspector Panels
8. A dedicated panel for presets
In previous versions of Picktorial, we tried to keep all image editing features in a single panel. This made everything accessible without switching between panels or tabs. However, you, our users, requested more real-estate for browsing presets, and the growth in other editing tools made it the best choice to move the presets browser to its own panel. In the new Preset panel we preferred vertical scrolling over horizontal scrolling, which is feels more natural, especially for those who work with legacy mice without horizontal scrolling.
9. A dedicated panel for metadata
The new Info panel lets you view and edits more metadata fields, such as “copyright”, “caption” “title” and more. You can also view more information about the camera settings at capture time.
10. A new History panel
Now you can jump to any point in the undo/redo history, without pressing Command + Z dozens of times!
Picktorial 3 is a major step forward, and we are already working on further improvements and new features coming in future updates. If you can’t find your most desired feature in Picktorial 3, please email us - we believe that user feedback is the best way to make Picktorial the finest photo editor in the world.