Picktorial Using the Library
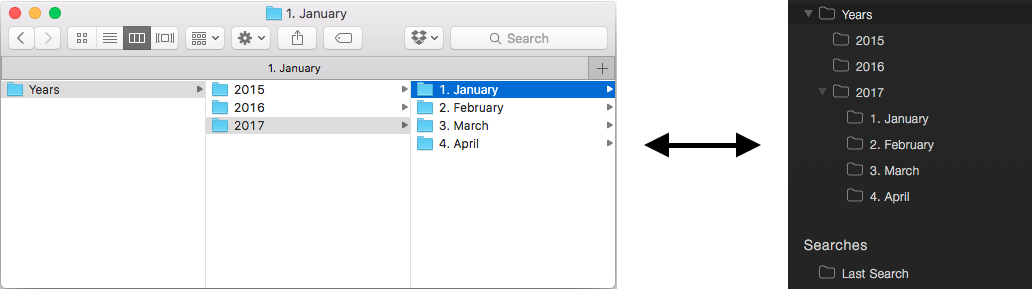
The library in Picktorial gives you a quick access to your photos. It consists of several referenced folders; each may contain sub-folders and photos. Picktorial automatically adds your Pictures folder from your home folder, but other folders and Aperture libraries can be added as well.
Note: The library is only available in the standalone version of Picktorial. When using Picktorial as an extension to macOS Photos, Picktorial relies on the library of the Photos app.
Show or hide the Library pane
Do one of the following:
- Choose Show/Hide Library from the View menu or Press Command [.
- Click the handle at the left-hand side of the Viewer to show, or drag the library pane edge all the way to the left to hide.
- Click the Show/Hide Library button (
 ) at the left side of the Window toolbar.
Adding a folder to the library is a lightweight operation. Picktorial does not make a copy of your photos or hide them in some hidden "media library". When you add a folder to the Library, Picktorial keeps a reference to this folders on your drive and displays the hierarchy of your folders as Finder does. For instance, if your photos are located in folders by year/month/photo - this structure will be reflected in Picktorial's library.
Where are edits saved?
Picktorial stores the metadata and non-destructive edits in XMP sidecar files next to the original RAW files. For JPEG, DNG and TIFF files, Picktorial embeds the metadata inside the original file.
This "catalog-free" approach enables you to sync your edits via standard solutions like Dropbox, Google Drive, or local network. Just keep your photos in a shared folder that is accessible from multiple machines.
This is a safer approach than sharing a single database file (in a case of an error, the whole database might get corrupted).
Working with a catalog-free library also enables you to use any standard backup solution, like TimeMachine to keep both your photos and the non-destructive edits safe. Take a look at this video to see this in action.
Folders
Import Existing Folders
To import an existing folder:
Open the library pane and click the
 button.
In the opened panel, navigate the file tree and find your folder.
Select the folder you want to import and click Open.
Alternatively, drag the folder from Finder to the Library pane or to the Viewer or to Picktorial icon at the Dock.
When you import a folder, Picktorial keeps a reference to the actual folder in your computer. Changes in the folder content or structure will reflect immediately in Picktorial and in most cases, Picktorial will automatically find it when it moves to another location on the drive.
Folders can be located on folders shared by services such as Dropbox and Google Drive, to allow working with colleagues or friends on the same photos, or streamline your work on multiple computers. When this is the case, make sure that your Mac is connected to the internet in order to sync changes immediately on auto-save and avoid conflicts.
Rename a Folder
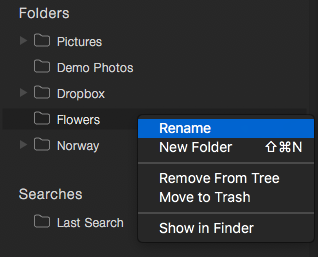
In the Library tree, navigate to the folder you want to rename and select it.
Hold the Control key and click the selected folder or right-click and choose Rename. Alternatively, select the folder and press Enter.
Type a new name for the folder.
When you're done typing, press Enter again or click somewhere in the window outside the folder label.
Create a New Folder
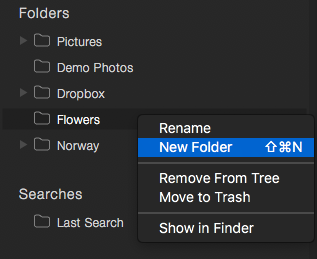
To create a new folder:
In the Library tree, navigate to the parent folder in which you want to create the new folder and select it.
Select the folder within Picktorial
In the Library tree, navigate to the parent folder in which you want to create the new folder and select it.
Hold the Control key and click the selected folder and choose New Folder from the context menu.
A sub-folder is opened, enter a folder name in the new sub-folder name box, else a default name will be used.
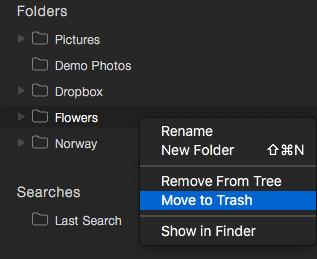
Remove a folder from the Library
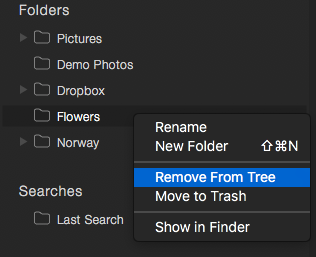
To remove a folder from Picktorial library:
In the Library tree, navigate to the folder that you want to reveal in Finder and select it.
Hold the Control key and click the selected folder or right-click and choose Remove From Tree.
Note that you can only remove folders and libraries from the top level of the tree because Picktorial presents folders by their structure in Finder.
Move a Folder to Trash
To move a folder to trash:
In the Library tree, navigate to the folder that you want to delete and select it.
Hold the Control key and click the selected folder or right-click and choose Move to Trash.
Note: Deleting folders is possible only when the parent folder is already somewhere in the Library.
Reveal a Folder in Finder
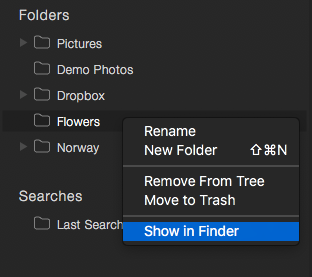
To show a folder in Finder:
In the Library tree, navigate to the folder, that you want to reveal in Finder and select it.
hold the Control key and click on the selected folder or right-click and choose Show in Finder from the popup menu.
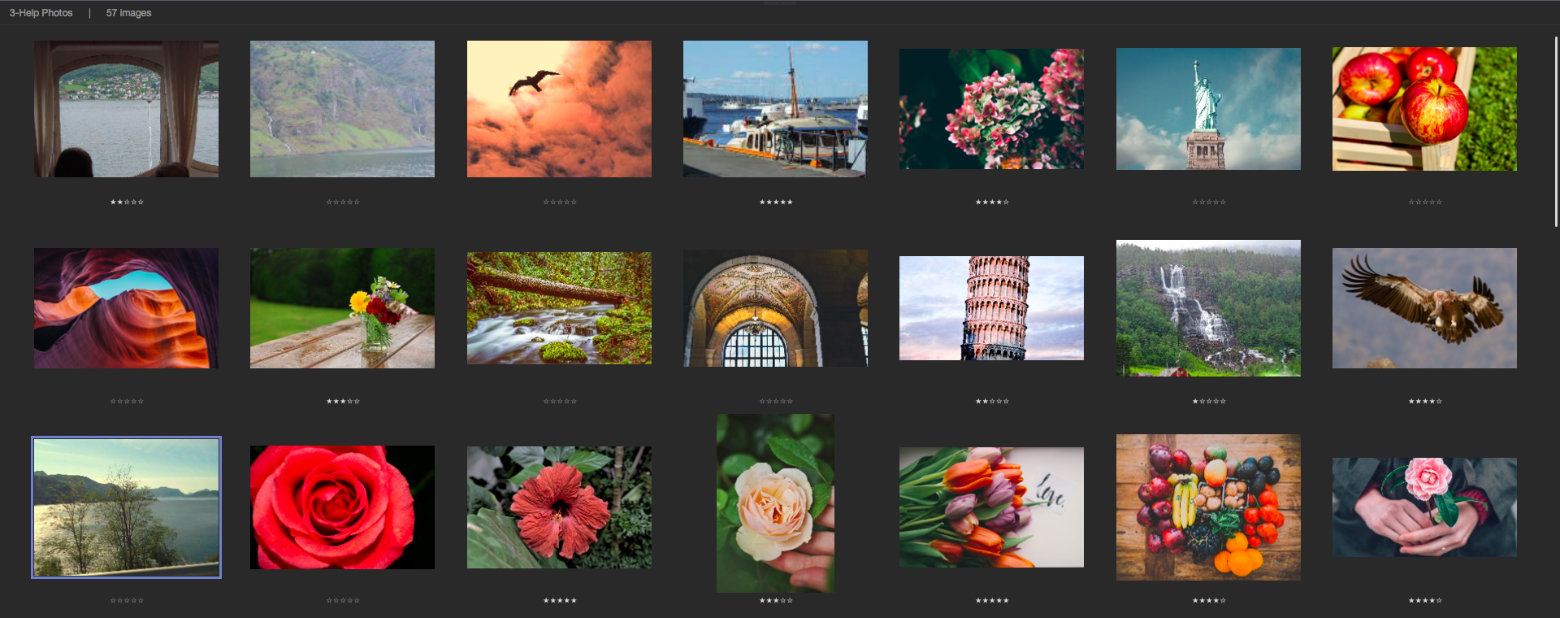
The Browser
The Browser links the Library and the Viewer. The Browser displays the photos in the selected folder as thumbnails and lets you open the full photo in the Viewer.
The Browser continuously updates any changes in the library (done for example via Finder) and any change in the photo that is done via the Viewer.
Some operations can be performed directly from the Browser. These include moving and copying files, sending to external image editors, rating photos, selecting a group of photos and more.

The Browser title displays the name of the folder and the number of thumbnails in the Browser.
The Browser automatically stacks JPEG and RAW files, so in case that both the JPEG and the RAW files are available, only the RAW file will be displayed in the Browser and the JPEG will be hidden.
Show or hide the Library pane
Do one of the following:
- Choose Show/Hide Browser from the View menu (or press Command /).
- Click the handle at the down side of the Viewer to show, or drag the Browser pane edge all the way to the left to hide.
- Click the Show/Hide Browser button (
 ) at the left side of the Window toolbar.
Control Browser Appearance
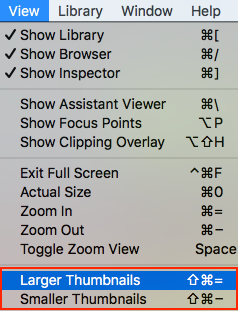
- To change the height of the Browser (with regard to the Viewer) drag the line between the Browser and the Viewer.
- To increase or decrease the size of the thumbnails select Larger Thumbnails or Smaller Thumbnails from the View menu (or press Shift Command = or Shift Command -).
Thumbnails
A thumbnail is a small representation of a photo. Picktorial automatically updates the thumbnails when the images change on the drive (either by Picktorial or by external apps) the photo is autosaved.
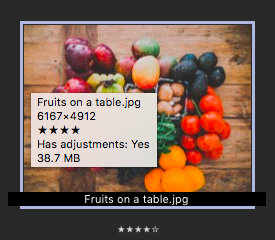
The rating of a photo is shown under its thumbnail.
When the mouse pauses over the thumbnail, A tooltip with additional information will be displayed.
Selecting Photos in the Browser
To select a photo in the Browser do one of the following:
- Click once on a thumbnail.
- Use the arrow keys to navigate to an adjacent photo.
- Drag the mouse from a point in the background to draw a rectangle around a group of thumbnails you want to select.
- To select multiple photos hold down the Command key, then click the thumbnails.
- To select multiple photos in a row, click the first item you want to select, hold down the Shift key, then click the last item.
- To Invert the selection, select Invert Selection from the Library menu.
- To select all items in the folder, press Command A.
while navigating photos in the browser is done using the arrow keys, you can easily navigate inside the library by holding Option and press the arrow keys.
Thumbnails Context Menu
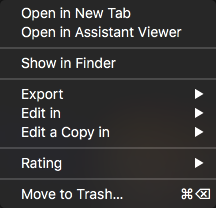
Right-click on a single thumbnail or a group of thumnails opens a menu with several options. When multiple photos are selected some unsupported options may be hidden.
Open a Photo in a New Tab
To open a photo in a new tab select Open in New Tab(s) from the context menu. When multiple photos are selected each photo will be opened in a separate tab.
Note: Opening multiple photos in separate tabs is limited to 3 photos at a time.
Open a Photo in the Assistant Viewer
To open the photo in the Assistant Viewer select Open in Assistant Viewer from the context menu. When multiple photos are selected each photo will be opened in a separate tab.
Show File in Finder
To show a photo in the Finder select Show in Finder from the context menu. This may be very useful to perform operations in Finder like copying photos from or to Folders that are not part of Picktorial's library tree.
Export a Photo to Folder or Social Networks
To export multiple photos to another folder or social networks click Export in the context menu.
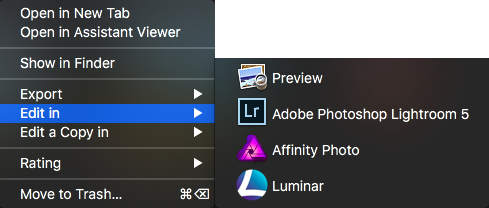
Working with External Photo Editors
To work with external photo editor click Edit in or Edit a copy in .
Move or Copy Photos to Another Folder
To move/copy photos to another folder drag the selected photos to the target folder in the Library or in Finder. When the source and the target folders are located in the same drive the default is moving the photos. Otherwise, the default is copying the photos. A  sign near the cursor indicates a copy operation.
To change the default hold the Option key while dragging.
Alternatively, To Move a file To another folder:
Use the File > Move To... menu.
A pane will be opened on the top of the window. Click on the right button and select a new folder.
Click the Move button to move the file to the target folder.
Note: You can only move or copy files between file-system folders. Copying files under Aperture libraries is not supported.
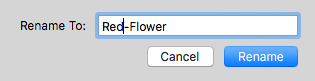
Rename a File
To rename a file:
Use the File > Rename... menu.
A pane will be opened on the top of the window. Type the new file name in the window and click Rename or press Enter.
Move Photos to Trash
You can move a photo or a group of selected photos to trash using the Browser. Select the photos, right-click to open the context menu and click Move To Trash. A pane will be opened on the top of the window.
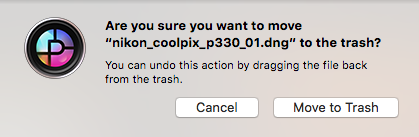
Click the Move To Trash button to move the file to Trash folder.
Alternatively, you can move the active photo to trash using one of the following:
- Choose File > Move To Trash... .
- Press Command + Delete.
Metadata

Metadata is a set of data that accompany the photo, mostly for a description of the photo contents and other information. Some of this information can be presented and edited in Picktorial in the Info panel of the Inspector, some of the fields are searchable.
The General section of the Info panel contains editable fields.
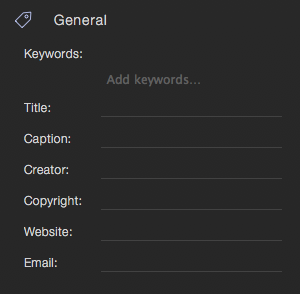
Working with keywords
You can add, modify and delete keywords by editing the comma-separated keyword text field in the General section. You can also search by keywords by typing the keyword in the search field.
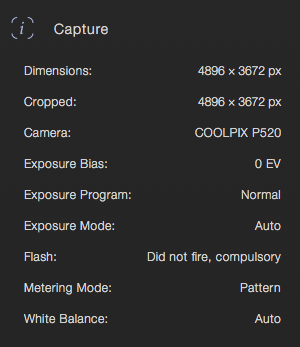
Capture - A list of data that were captured by the camera and could not be changed
Set the Rating of a Photo
To set the rating for one or a group of selected photos:
Select File > Rating, or choose Rating from the thumbnail contextual menu in the Browser.
Select one of the rating options from the sub-menu
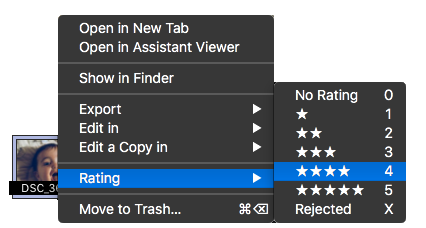
Alternatively, press 0, 1, 2, 3, 4, 5 keys to rate the photo or X key to mark it as Rejected.
Search for photos
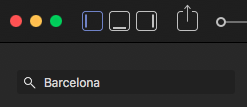
Picktorial lets you search for photos by their file properties and metadata. To search for photos that contain some text in their file name or metadata Including:
- Photo Name
- Keyword
- Camera name
- Camera Maker
- Rating
To search for photos that contain some text in their file name or metadata:
Type the text phrase in the search field at the top-left corner of the window.
Search by Rating:

To search for photos by rating
- Click on the search bar at the top of the library pane.
- Type like "rating=3", "rating>=4" or "rating: rejected"
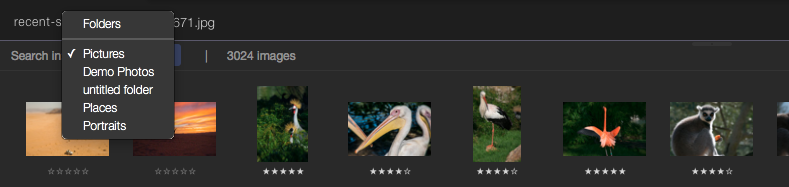
Set the Scope of the Search
By default, Picktorial searches in the currently selected folder and its subfolders, or if the selected item of the tree is not a searchable folder it searches in all searchable folders added to the library.
Last Search

You can open your last search results by opening Last Search under Searches in Library.
Change the search scope
By default, the previously selected Folder will set a the search scope. To change the scope select one of the parent folders from the search-in menu at the Browser title-bar.
Sync
Every photographer needs to back up his or her photos in the cloud and expects easy sync across devices and computers.
And nearly every kind of photographer needs cloud backups, from beginners who shoot on their mobile phones and store on their computer - when their mobile device inevitably runs out of space - to pros who can’t store their RAW files on just a single drive, or may work on more than one computer, or in collaboration with other photographers or retouchers.
Many non-destructive photo editors use a database to store adjustments and metadata. Sometimes, databases get corrupted or reformat data in a way that makes it difficult to recover files. It’s also a more tenuous process to sync a database than it is to sync individual files. This limitation necessitates special syncing and backup solutions, tailored to that specific database structure - a lengthy and sometimes costly process
Picktorial Unique Approach
Picktorial lets you use your favorite cloud service, including Dropbox, Google Drive, iCloud, Microsoft OneDrive and others. And, of course, if you use an external drive or a network drive to store or move your photos between computers - Picktorial will sync those files perfectly, as well.
All you need to do is store your photos in a cloud service’s sync folder on your computer. And wherever your photo files sync to - you will find your adjustments and metadata there too!
Picktorial stores adjustments as a small "chunk" alongside the file itself. For RAW files this is kept in a sidecar file near the RAW file, while for other image formats (including JPEG, DNG and TIFF) we embed this in the file itself. Picktorial automatically monitors referenced folders, so when your photos are synced (e.g. by Dropbox), Picktorial on the other computer will detect these changes and update its Browser automatically.
You are free to choose your cloud storage provider or use an external or network drive. We believe that either of these options is preferable to dedicated sync options offered in external photo editing applications.
Note: For those of you who work with macOS Photos and sync your images using iCloud, it's easy to use Picktorial, as well. Picktorial can also run as a Photos extension, with the entire tool set of the standalone version.